|
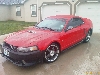
As some of you know, I am taking on a big project this upcoming winter. Big for me anyway. I will not give anything away, but will update this page as often as i can with each thing I do. So you will have to check back every so often to see whats next.
This project wont begin extensively for a few weeks yet, but Ive already started on some little things to keep me busy.
*********************************************
So it begins.... Project: Horsepower
Winter 06'-07'
*********************************************
First, I picked up a Polished Vortech V1 S-Trim supercharger. I am still missing a few key components like LMAF, Injectors and Fuel Pump, to complete the kit. They are next on my list.
Here is what I got and where I am thus far...
|
Vortech V1 S-Trim Supercharger, fully polished.
|
Here are The compnents I picked up, full intake and discharge assy.
|
The first project on my list of "keeping busy" is to take care of that Grey powdercoated discharge tube. It just does not fit in with my plans as it sits.
Here is the Discharge Tube in stock grey form...yuk. I started with aircraft stripper to remove the bulk of the grey.
|
Here is the tube with the stripper applied. powedercoat can be a bitch to get off, in this case, a little more force is used...
|
Next, a wire wheel on a drill does the job perfectly in getting the rest of the color off.
|
Here is what it looks like half completed.
|
Just another shot of it half stripped.
|
Here is after a bit of sanding
|
After a few hours of sanding with various grits, and more sanding on top of that, here is the result.
|
Here is the result with everything sort of "mocked up"
|
|
|
AFTER:

|
Well, I've started to tear a few things apart and "mock-up" the s/c to make sure everything fits right and to ultimately see exactly what needs to be done when i get to that point. Ive taken a few pics of the process as well as a few teaser shots. Tomorrow, it all comes apart again and back on the shelf for a while until its ready to go on.
As is sat before i started...dirty, i know 
|
Another shot in as is form (strut bar removed)

|
Some coolant drained, Upper rad hose removed.
|
S/C Bolted up, she fit perfectly.

|
|
|
Here is a shot with the intake and discharge in place.

|
|
|
Teaser # 2

|
*********************************************
New Part Arrival 11/7/06
ModMax Forged H-Beam Rods
*********************************************
|
|
A nice close up

|
*********************************************
The teardown begins.....
*********************************************
|
|
Intake Manifold off.

|
|
|
Same thing, different angle....dirrrty.

|
|
|
Exhaust unbolted, harnesses unplugged.

|
Power Steering pump removed.
|
Hoist ready and in position!

|
|
|
Completely up an out.

|
This is ME in my engine removal attire 
|
|
|
On a tire until i get my stand.

|
|
|
Nasty paper thin original clutch.

|
*********************************************
Stripping the motor naked 
*********************************************
Valve covers off, Rear Shot.
|
Front Shot.

|
Crank Pulley, timing cover off.
|
Timing Chains, guides off.

|
Heads removed. Almost there!
|
Heads/Cams Removed.

|
Block upside down on stand.
|
Crank/Rods/Piston assembly.

|
|
|
Crank/Rods/Pistons GONE!

|
|
|
Stock exhaust manifolds. Ewww.
|
|
|
MORE parts!

|
|
|
Even MORE!!!!!

|
|
|
Rod Comparison #2

|
*********************************************
Making some old parts...
look new again!
*********************************************
Well, since the motor is torn down to the bare block, I need to accumulate more parts before i can send the motor off to the machine shop. In the meantime, I kept busy with the freshening up of some parts. The parts include the front timing cover, the supercharger bracket and the oil filter housing.
I chose to paint, instead of powdercoating, mainly because of cost. If painted properly and with the right paint, you can have the same result. Paint = $15 vs. Powdercoating = $120
The paint products i used were Duplicolor High Heat engine enamel. Primer, color (Cast Iron) and clear coat. The same process was used on all 3 parts. The key is preperation. Getting the parts CLEAN. A wire wheel was used on a drill to remove the oxidation. Simple green was used to clean the parts, followed by brake cleaner and alcohol. 2 coats of Primer, then 2 coats of color, and finished off with 2 heavy coats of clear.
The lighting in some pics was tough, but the color is closer to the "darker" pictures.
The Timing Cover
|
|
Half cleaned with wire wheel.

|
Fully cleaned with wire wheel.
|
A nice coat of primer.

|
|
|
Two coats of color.

|
|
|
Two coats of clear.

|
The Supercharger Bracket
|
|
Some primer.

|
|
|
One coat of clear.

|
|
Two coats of clear and done!

|
The Oil Filter Housing
Folter housing as it was.
|
Some Primer.

|
|
|
Some Clear.

|
*********************************************
While the Engine is away...
The paint will spray!
*********************************************
12/14/06: Well, the engine is officially at the machine shop.
Getting hot tanked, and bored/honed .20 over. The machine shop will also be handling the entire long block assembly.
Since the pistons and rods will be forged, I will be upping my boost level to about 12 lbs. This, in conjunction with all of the other mods and upgrades I have planned, I should be near my goal of 450+ rwhp very easily.
In the meantime, since all my money has gone to parts and the machine shop, i have had some more time on my hands. I freshened up a few more parts (below). I repainted the timing cover and s/c bracket with a black base coat to darken it up (it was too light for me). I put 1 updated pic of each at the end of their own painting sequence above..
|
|
Some Color.

|
|
|
Both Heads Done.

|
|
|
EGR Painted High Temp.

|
|
|
Water Pump Painted.

|
*********************************************
12/14/06 New part Arrival!
*********************************************
My pistons and rings arrived! MMR Manley 18cc Dished pistons with .20 overbore. Speed Pro moly file fit pistons rings. Look at the difference from stock!! I still have a TON of parts to buy!
|
|
Piston(s) with Rings

|
|
|
Underside.

|
|
|
Comparison Side.

|
|
|
Ring Set.

|
*********************************************
More New Parts Arrived
*********************************************
Well, after a GREAT deal fell into my lap, i was able to pick up a brand new Forged Crankshaft. It is currently at the builder Now that I will have a FULLY forged shortblock, i can really crank up the boost! I was also able to pick up a brand spanking new FRPP intake manifold with the aluminum crossover, as well as a PA Racing Tubular K-Member, and an 11" Cobra flywheel for a GREAT price thanks to Ron (AKA: Redstang)
As for my cams, the HP ones i bought from GS Member Mug11, were not correct. I was lied to, and i felt taken advantage of. I wanted billet cams, and what he sold me ended up being re-grinds. I asked him about it and was told by him "There is nothing I can do, just sell them". The he basically told me to deal with it. Well, I paid him $325 for them, thinking they were billet like HE TOLD me they were. Regrinds, if your lucky sell for about $200. I since have heard not 1 thing from Mug11 regarding this. So, assuming i was going to get nowhere with his evil ways, i sold them for as much as i could, and took a big loss. live and learn i guess. what goes around comes around Mug11 !!!!
|
|
Another shot of crank.

|
|
|
K-Member 2.

|
|
|
K-Member 4.

|
|
|
FRPP Intake Manifold.

|
*********************************************
PA Racing Tubular K-Member Installation
*********************************************
|
|
Strut Unbolted.

|
|
|
Inside shot of stock K-Member.

|
|
|
Time for the other side!

|
A-Arm/Spindal assy. dropped.
|
Top view of rack dropped.

|
|
|
Stock K-Member GONE!.

|
|
|
Comparison of the 2 K's.

|
|
Hello from the engine bay!

|
I decided that the A-Arms were too nastly looking, and we cant have that!! So, with the same paint i used on some of the engine parts (Cast Iron Gray), I desided to spruce them up a bit, along with the spindals and such. Not perfect by any means (its not meant to be), but i couldnt bolt up "rust" to my new K-Member
Painted A-Arm assy.

|
Another Shot.

|
Other side.

|
Other side 2.

|
|
Frontal shot.

|
New K is in.

|
Before A-Arms go on.

|
Front Underside.

|
Front Underside 2.

|
Other side.

|
A-Arms on, springs in.

|
|
Engine bay shot installed.

|
Thats it for now. Right now, The struts are not bolted down as of yet, I am waiting to get my CC plates in before i do that (just for ease). Next step, is to get more $$ to my builder and buy new cams, then get the motor back here. I should have had more money to the builder, but Ron (redstang) was kind enough to cut me a hell of a deal on all those parts, and i just couldn't pass it up. hey, it was all in the plans anyway!
*********************************************
More New Parts = More Updates
1/27/07
*********************************************
Well...Since my last update, i have received some more goodies, as well as did a few little things here and there to keep busy. My new cams came in. Billet VT Stage 2 Blower cams to be exact. according to VT's website...with unported heads, these produced 87 extra ponies But who's counting 
I also received my new Comp Cams Behive Valve Springs (couldnt get a picture before they went to the builder). Along with those cam my OEM Bolt on cam gears (mine were pressed on and couldnt use them). Last but not least, I received my new MMR Cryo'd Cobra race Oil Pump and Cobra High Flow Pickup tube! This was the very LAST bit of parts I had to give to my builder.
The builder should have this thing wrapped up by the first week of February. I most likely wont be done paying him off for it, as I still have quite a ways to go, but it shoudn't be long! Buying parts and paying them has been hard!! I am in the home stretch with getting that motor back into my possesion! Then its on to Chapter 2 !!
|
Comp Cams Beehive Springs.

|
MMR Race (Cryo'd) Oil Pump
|
Oil Pump & High Flow Pickup

|
|
|
Cams Close-up.

|
I removed my stock bell housing (which was hacked up and un-safe) and got everything ready for the new one..well, its not new, its used, and its nothing special...its just not hacked up like mine was.
Out of sheer boredom, I decided to paint my new FRPP Intake Manifold with High Temp Gloss black paint. then some clear. I also painted the alum. crossover to match the other dark gray accents i painted. I did this for 2 reasons. #1, i dislike the "dulness" of the intake in stock form. and #2, the same reason i painted my first one red, was because after while, the stock black plastic gets hazy and white in spots, and unless you armor all the nooks and crannys (for car shows), its really a bitch to make it look good. So I painted it.
I also polished up the thermostat housing (not perfect) but 100000% better than it was, and cleared it as well. clearing the aluminum parts will prevent future corosion. I also did some minor assembly of the intake manifold, minus the injectors (dont have them yet). This was mostly just to keep everything together, and so see how it would look. =).
Something else i have been doing for a while, is taking every single visible bolt and nut, and hitting it on my new soft wire buffing wheel. This removes corosion and basically brings the shine back to the nuts and bolts...basically restoring them, better than new. its tedeous, but worth it....you can see them place in the intake manifold....
Hacked Bell Housing Gone!
|
Up close with trans.

|
|
|
Another Shot.

|
|
|
Polished T-Stat Housing.

|
|
|
Intake Assy. #2.

|
|
|
Intake Assy. #4, TB Side.

|
*********************************************
More Parts + Completed Longblock = Progress!
3/4/07
*********************************************
Well...I am finally over that long hump of waiting on parts and waiting on my engine. As of Wednesday February 28th, 2007 the engine is back into my possesion! Along with a bunch of goodies! I have the engine mostly assembled. most will come back off for the install, but i HAD to see what it was going to look like! Im glad i did pre-fit everything because i ended up grinding a little off the face of the alternator because the s/c idler pulley was rubbing it.
The list of parts consists of every gasket known to man, such as valve covers, oil pan, timing cover etc, along with an EGR Delete kit (block off plate, which i polished and cap for headers thanks to Randy Stinchcomb via Liberty Ford in Maryland (who can be found on ModularDepot.com, nice discounts for dealer items).
Also picked up a set of BBK Long tube headers and matching BBK off road h pipe.
I Ordered the Moroso 7 qt oil pan! The moroso pan is especially nice, because the s/c drain bung is already there!
I also put a new (used) bellhousing back on the transmission to replace my old cut up one.
I also gor a Cobra 11" Nodular Flywheel
anyway, on to the pics for now....
|
|
31 Spline Carrier

|
|
|
EGR Delete.

|
|
|
BBK O/R H Pipe.

|
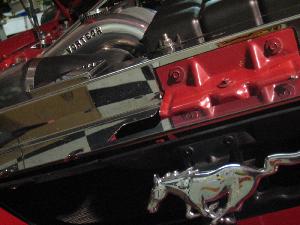
A Basic reminder and rundown of what your looking at in the block...
All parts are 100% brand new, except the cams)
Forged Cobra Crank Shaft
Manley Forged 18cc Dished Pistons
ModMax Forged H-Beam Rods
ARP 200 Rod Bolts
ARP Main Cap Studs
ARP Head Studs
Speed Pro Moly File-Fit Rings
MMR Cryo'd Cobra Oil Pump w/pickup
Comp Cams Beehive Valve Springs
VT Stage 2 Billet Blower Cams
|
|
Block #2.

|
|
|
Block #4.

|
|
|
Block again.

|
|
|
Side with Pan.

|
|
|
Minor Assy.

|
|
|
Header #2.

|
Here I have the s/c mounting finalized, the crank pulley is fully on, motor mounts are on, p/s pump is on, alternator already modified etc. this is how it sits as of right now.
|
|
Another Shot.

|
I have oem valve covers coming in any day now, that I will paint to match he scheme, but not until after I run 2 heat cycles and re tourque the head studs...this is to avoid scratches etc. Right now, I basically only have to order a clutch, then it will be ready to go back in the car!!
Stay tuned....
*********************************************
Keeping busy = Motor going in!!
4/3/07
*********************************************
Wow, so its getting REAL close. As of today 4/3/07, The only thing left to do engine wise, is tie up some loose ends here and there like extending the o2s for the long tubes, bolt up the exhaust, and get the fuel pumps installed/situated. Then, i can upload the base tune (still have to order the sct tuner) and shes a runner. You all will hear this thing run shortly after i do...trust me! I will break the motor in properly as much as i can before my dyno tune which is scheduled for May 23rd. The following week, the car will be in Carlisle for the All Ford Nationals.
I ordered my 42# injectors and MPH 4" Power Pipe. They should be here any day. a few nuts here, and a few bolts there and its done!
Since the last update, some other parts came in. A Centerforce Dual Friction 11" Cluch and t/o bearing, and my SCT BA2400 Big Air mass air meter. Even a stainless thermostat LOL.
I have also painted my valve covers gloss black, and hand painted the stripes in them with red to match the car. Im tired! Its fun for a while, but i never prepared for the work load and stress involved with this project. it is a task!
Well, enough talk, onto the pictures....
PS...Hopefully my next update will be the car complete...maybe not running, but complete none the less....depends on how long it takes to get the tuner etc.
|
|
Close Up...

|
|
|
MAF Adapter

|
|
|
Stainless Stat

|
The "Cooling Mod". Basically, a drilled and tapped hole in the rear driver coolant passage (a dead end in stock form), with a line that runs to the coolant crossover. This allows more circulation and overall flow around the #8 cylinder, thus keeping that cylinder cooler. #8 is a known problem for a large percentage of blown mod motors. Cheap insurance.
|
|
VC's Installed

|
|
|
Side Shot

|
Be advised, the motor did NOT go in like this. it was an attempt, out of curiosity, and it failed. We ended up pulling the transmission, and installing the motor and transmission as one assembly. There are not alot of "install" pictures as it was a trying and frustrating day. pics were the last thing i was worried about...but i did get one here and there when i remembered.
|
|
Close Up

|
|
Our friend helping out...
|
|
|
BOOM. In.

|
|
|
All Blower

|
Got some assembly done. well, alot of it lol. When looking at the pics below, do not visualize that as the final product. I have alot to "clean up" yet...such as gettin the injectors in (when they get here) and plugging them in so the harness isnt laying all over the place...some touch up stuff from install damage LOL...and i physically have to CLEAN everything. stting in my garage for so long has collected alot of dust and fingerprints etc. When its complete, you will see a WORLD of difference. Therefore, the pictures below are for refference ONLY lol =)
|
|
Coming together.

|
More...

|
|
See My Engine /Performance Page for the Final Results!!
| 


 Project: Horsepower