This page will be dedicated to the interior refinishing. I have all the stuff to do an ENTIRE overhaul of my GT's insides, now I just need time!!! I plan on replaceing the carpet front and rear, new seat skins in the factory color and design, new door pieces and replacing, repairing, or repainting any bad plastic. Any volunteers for the dirty work?!?! 
Update 05.21.09
I finally got around to changing the carpet.
I got everything out and was unpleasantly suprised. I knew I had a hole in the floor under the dead pedal but I had no idea how bad the damage was NOR did I see the rip under the passenger side in the same place.
THE RUST MONSTER HAS PAID A VISIT THAT IS THE GROUND!!!!!
Passenger side
My dad and I cut out the hole square, I ground down to bare metal, welded in a patch panel, and covered it with fiber glass. I "messaged" the metal back into place on the passenger side, wleded and fiberglassed it as well. After that, we took a few cans of rubberized under coating and sprayed the entire floor and the under side of the repaired areas.
Patched with a metal panel cut to size and glassed over the area.
Driver side after the rubberized under coat
Driver side Passenger side
Passenger side
I purchased my new carpet from CJ Pony Parts.com and ordered the better "Massed Backed" carpet they had but I wanted to add a little extra so I used some insulation my dad had put in his 1966 Plymouth Fury. It is a bubble wrap material sandwiched between two layers of aluminum foil.
It's sold at Lowes for about $20.00 for a 16" x 25' roll. Two rolls did the whole floor and the headliner. It's called AIR DUCT INSULATION and it's in the insulation isle. I was going to do DYNOMAT but for $120.00 less you can't go wrong!!!
I used duct tape to seam it together and headliner glue to install it to the back side of the headliner itself. On hind site, I should have glued it to the roof of the car (like factory) because now when you tap the top of the car, it sound "hollow". Not a big deal I guess but if attached to the roof, it would deaden that sound.
After installing the insulation, I ran all my audio cables through the car. If your planning ANY kind of upgrades in this department, now is the time to do it so you can route them out of the way and secure them properly. Next I threw in the carpet that had been setting out in the sun for a few hours. We laid it in the car and made the cuts for the E- brake and the shifter after first centering it up. I recommend doing it this way so you get the carpet flat as possible on the floor making sure you have enough material left on the edges before you cut your seat bolt and seat belt holes.
 
Work the wrinkles out as best you can but after a few heat cycles it will lay out and conform a little bit more.
Next up is the hatch carpet I also purchased from CJ Pony Parts. I'll update as soon as I get more time...
4.07.10
IT LIVES!!!!!
Hey Guys and Gals,
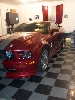
Just finished up the LONG OVER DUE interior!!!
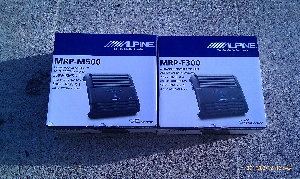
New seats skins, carpet, paint, console, stereo system, and door pieces!!!! Here are a few pics...
Repainted all the plastic interior pieces with industrial medium grey. It's a little more "grey" color than the original Titainium but I think it looks good....and I have an endless supply of it!!! shhh 
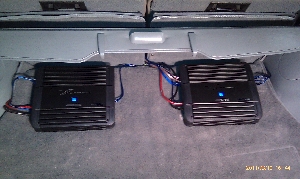
 Trace helping rewire the amps... Trace helping rewire the amps...
 "Ok dad, this goes up here. Get me the screws!!" "Ok dad, this goes up here. Get me the screws!!"
 "YOUR NOT DOING IT RIGHT!! PUT DOWN THE FRIGGIN' CAMERA AND HELP!!!!! "YOUR NOT DOING IT RIGHT!! PUT DOWN THE FRIGGIN' CAMERA AND HELP!!!!!
BEFORE AFTER
 
BEFORE AFTER
Now on to the front...
BEFORE AFTER
Looks MUCH BETTER I think. I couldn't be happier with the results from CJ Pony's seat skins and Ivans Upolstery in Mt. Vernon IL.
Here's a recap...

Now hopefully we can ride around and enjoy for a while instead of piecing things together...
Thanks to my son for all his help! 
GTNBY2
| 


 2009 Interior update