The block is a '69 351W ( 9.48" deck height ) from a Torino. Casting code is C90E-6015-B 8 and 0D3 was the build date. I still haven't figured out how to convert the build date yet... but I'm guessing April 3rd.
New parts for the buildup are as follows:
- AD Performance -
SCAT 408ci Stroker Kit (Scat 9000 Crank / Scat Forged Rods / Probe Forged Pistons)
Total Seal Moly Rings - CR1001 35
Clevite Rod Bearings - CB-663 P
Clevite Main Bearings - MS-981 P
UPDATE 05-09-05:
Air Flow Research AFR 205 aluminum race heads - 1450
- Summit Racing -
Edelbrock Victor Jr. 351w Intake - EDL-2981
Mallory Unilite Distributor - MAA-3755401
Milodon 8 qt Deep Sump Oil Pan - MIL-30926
Milodon Oil Pump Pickup for 8 qt. - MIL-18365
Melling High Volume Oil Pump - MEL-M83HV
Melling Oil Pump Driveshaft - MEL-IS83
Milodon Aluminum High Flow Water Pump - MIL-16230
Ford Motorsport Polished Valve Covers - FMS-M-6582-E302P
Felpro 351w Gasket Kit - FEL-KS2309
ARP 351W Head bolts - ARP-154-3603
Ford Motorsport head alignment dowels - FMS-M6026A302
Comp Cams pushrods for 351W - CCA-7835-16
Crower Lifters - CRO-66915-16
Clevite Cam Bearings - CLE-SH510S
Summit Freeze Plugs - SLP-381-8015
RAM Pilot Bushing for Richmond 5 Speed - RAM-BU50J
Crane Cams Lube - CRN-99002-1
Red Line Assembly Lube 4oz - RED-80312
Summit O2 Sensor weld-in bung - SUM-G2990
UPDATE 05-09-05 for AFR head swap:
FelPro 351w Head Gasket - FPP-10111
FelPro 351w Exhaust Gasket Kit - FPP-1487
FelPro 351w Intake Gasket Kit 1.28 in. x 2.10 in. - FPP-1262
FelPro 351w Valve Cover Gasket Kit - FPP-1613
- Crower.com -
Crower Mechanical Lift Cam - 15359
- Car Shop Inc. -
Hedman 351W Swap Headers - HED-88660
____________
Schedule:
Clean / Paint block
Check clearances
Crank / Rods to block
Bearings - Rods, Mains
Oil pump sump depth
Crank to Oil Pan
File fit rings
(Yank old motor - heads, timing chain, balancer, flywheel)
Check cam profile
Modify heads to accept 351W head bolts
Install heads
Inspect valve clearance
Degree the cam
Balance rolling assembly (crank, rods, pins, pistons/rings, balancer, flywheel)
Assemble motor
Install motor
____________
Initially, I'll be using my current heads... 54cc 289 1.94/1.60 shaved, ported, and polished. The plan is to move to a set of aluminum heads shortly thereafter. I'm leaning toward the Edelbrock Victor Jr. 2.05/1.60 60cc heads, but may snag a set of AFR's instead.
After playing around with Dyno2003, I've come up with the following information. The current 289 motor is indicated with the line with boxes, and the new motor is the line without boxes. Both motors use the same heads, intake, and carb. Notice that the MINIMUM torque on the new motor is more than the MAX on the 289! Finally, NO MORE 7000RPM LAUNCHES! :thumb:

The following chart is comparing the current 289 motor to the finished 408 stroker that includes Edelbrock Victor Jr. heads ( using actual flow numbers from Edelbrock.com ). This config will run on low to mid grade gasoline.

____________
06-09-04 - Cleaned the block and file fit the rings.
06-10-04 - Moved everything to the shop and checked main clearance.
06-11-04 - Performed final cleanup on block and installed cam. I also yanked the heads off the old motor and noticed some wierd green buildup in 1 cylinder on each head. Looks like I'm gonna have to completely disassemble the heads and clean them up.
06-14-04 - I've inspected the wierd buildup on the heads and it seems like it'll be ok. I've also managed to check the piston/valve clearance and it looks good, however, the piston seems to be coming outta the block about 0.015.  The head gasket compresses to 0.04, so there's 0.025 clearance. I hope to take the assembly to be balanced Wed (today is Mon). The head gasket compresses to 0.04, so there's 0.025 clearance. I hope to take the assembly to be balanced Wed (today is Mon).
06-15-04 - The old motor has now been yanked, and the flywheel removed so I can get everything balanced tomorrow. I also managed to figure out the piston clearance. Now I have 1 piston with 0.009 clearance and the rest are 0.006 or lower, which is acceptable.
06-16-04 - I waited outside Auto Machine Service for about 30 min this morning to drop off my rotating assembly for balancing, but finally gave up on them ever opening and went to another shop nearby - Top End Performance. I dropped everything off and expected it to take till Monday ( today is Wed.) but they say it'll be done tomorrow! Holy SMOKES that's fast! :insane:
Tonight I'll focus on cleaning up the bellhousing, heads, and engine bay. After that, I'll spray the block and heads with engine paint. I also need to take the timing and valve covers to work so I can sandblast and repaint. If I'm lucky, the car may be driveable next week! 
06-16-04 - After thoroughly cleaning the bellhousing and heads, I painted the block and heads aluminum 1200 degree paint. Looks pretty good so far. Will sandblast the aluminum timing cover tomorrow.
06-17-04 - Balancing is complete and the bottom end is assembled!
06-18-04 - Degree'd the cam and came out with:
Seat IVO 28.5 / IVC 72 - EVO 74 / EVC 31.5 ( 280.5 / 285.5 duration )
0.050 IVO 8.5 / IVC 52 - EVO 55 / EVC 12.5 ( 240.5 / 247.5 duration )
0.533 / 0.550 lift with 112.75 lobe center
Lift and duration are both lower than spec, but I think it'll be ok since it's close.
06-19-04 (Early AM) - The bottom end has been buttoned up and the heads / valvetrain is complete. The Victor Jr. intake seems to be interfering a little with the 289 heads, but I'm trimming the intake a little to get things to fit. There should be no side effects when I switch to 351W heads. The intake is the last missing piece, then I have to shift gears and focus on cleaning and repainting the engine bay.
06-21-04 - Motor's done! After walking through the local Father's Day carshow and checking out valvecovers, it looks like I'm gonna order a set of plain aluminum (tall) valvecovers and paint them yellow since leaving them aluminum makes the motor TOO shiney. :lol: Since I have to use Hi-temp paint, I'll repaint the aircleaner at the same time so the two colors match. I haven't decided whether or not to paint the pulley's yellow too. I might try it and if it looks hideous, I'll switch back to black.
06-22-04 - The pulleys looked HIDEOUS in yellow, so I went black. I also found a GREAT yellow anodized color for the valve covers. I'll be getting the air cleaner chromed so I can yellow anodize it as well.
06-23-04 - AARGH!  issed: After 4 hours of wrestling with the tranny 1/2" away from engaging, I finally had to give up for the night. Gonna have to yank the tranny and inspect the input shaft/pilot bearing to see what's wrong. /sigh Anyhow, here's some shots of the attempt. issed: After 4 hours of wrestling with the tranny 1/2" away from engaging, I finally had to give up for the night. Gonna have to yank the tranny and inspect the input shaft/pilot bearing to see what's wrong. /sigh Anyhow, here's some shots of the attempt.
06-24-04 - It's IN! I had to remove the motor, yank the tranny, measure the input shaft and pilot bushing to determine that I had the wrong pilot bushing. Since it's brass, I just drilled out the center and mounted the tranny to the motor then stabbed them both in together. I did put a massive ding in the radiator support, but it's easily repaired and eventually will be covered by a sheetmetal cowl to help the forced air setup.
Now that it's installed, I can have a good trip this weekend with that off my mind.
06-27-04 - It's A L I E E E V E! It was an all day job getting it running, but it's broke in and road tested! :insane:
I had quite a bit of trouble getting the headers installed. On the driver side, I had to disconnect the motor mount then use the engine puller to raise and rotate the motor toward the passenger side, but once that was done, they went in fine. I did the same on the passenger side, but the STOCK engine plate (bellhousing attaches to it) interfered with the header, so I had to grind the plate to get a good fit.
When it finally came time to fire up the motor, everything was going smoothly for about 1 minute, then I started seeing smoke... then FIRE! Apparently 500 degree engine paint isn't good enough to use on headers, so I had a number of little fires going while it burned off the paint. Was quite scary, but I wasn't gonna shut down the motor unless I absolutely had to. At one point, somehow the #7 plug wire became wedged between the body and the header and caught fire. I actually had to toss water on the wire to quell the fire, but managed to pull it away from the header enough to keep it firing. Upon inspection, the wire is 75% wasted, so I'll have to replace it... which sucks since I doubt I'll find a black wire to match. 
About 10 minutes into the break in, and after the fires were under control, I noticed the overflow was spewing fluid. I decided to kill the motor at that point and cool everything down. About 15 min later, I fired it up again, but only got 5 min before it had overheated again, so I opted to yank the thermostat. The next break in session was great. My father-in-law showed up, and manned a waterhose on the radiator. After 20min, the temp was only at 1/2, but I noticed the driver side collector was glowing red and that the interior had some smoke starting to appear. The firewall had gotten too hot, and the underliner started to smoulder, so I shut down the motor and hosed down the lower dash. At this point, the cam was successfully broken in!
Next, I set the initial timing and took it out for a quick stroll, keeping rpm's above 2000 and under 4000. It had been raining, so I didn't really get to see what kinda power the motor had, but at least I did get to DRIVE it for the first time in a few weeks! Felt great!
The only thing left to do is adjust the mechanical advance in the dizzy, rejet the carb, and get the exhaust finished. I need to have an exhaust shop run a little section of pipe from the new shorty collector location to the old longtube header collector flange location so I can bolt up the old exhaust. Other than that, it's purdy much done! /cheer
06-28-04 - Overheating prollems are solved. I fattened up the carb and set the timing to 38 degrees total advance and it's staying cool as ever. I even took it out on the street for a good tire warming. :insane: I was able to be rolling in second ( or first ) and mash the pedal to get the tires to break loose. Scared the crap outta my father-in-law since I was getting squirley next to a ditch, and he wasn't strapped in. :muhaha:
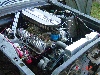
Tomorrow morning I get the exhaust installed so I'll try to record some audio with open headers and closed exhaust. :wink: You can see the exhaust packed in the passenger area in the pic below. hehe
06-29-04 - WOW! It's SOOOOO quiet compared to the old UNBALANCED motor! The exhaust is complete and I'm VERY pleased with the results! There's an oil leak coming outta the oil pressure sending unit. Once that is solved, I'll consider the buildup complete and close this page. :beers:
____________
05-09-05 - Adding a set of AFR 205 Heads, so I'll post updates here. They should arrive on the 11th or 12th. The following dynosheet compares the current build to the new build. It shows almost a 100HP increase, which may even be more since I had to guesstimate the 289 head flow values and gave them top end flow numbers JIC.

05-13-05 - The heads arrived on time!


Here's the progress!


I'm done for the night. Tomorrow morning, I'm heading to a fellas house to have him test the spring seat pressure to make sure it's within spec. Then I'll check the piston / valve clearance. After that, it'll be assembly time!
05-14-05 - I fired her up a little after midnight (05-15), and she sounded fine. Won't get to test drive her till the morning, but I'm satisfied to have it completed.
Here's some pics from today. Russ Peek and I found that the heads had 0.150 worth of shims in them, which meant that the springs would have coil bound with the lift my cam has. After yanking the shims, it was MUCH better, and I shouldn't have trouble eating through the cam lobes either. /phew


Took out ALL those shims! Scary!


|


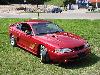
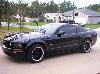
 PROJECT: 408 Stroker