|
Rear Seat Delete, Dress Up items
New Hood, Roll Bar, Gauges, Side Scoops
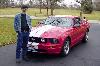
I have decided to do small mods to enhance my overall work on the car. I am very pleased with the look of the car, but I feel I need to tweak the car to maximize its effect. So below are a few of the little touches that I hope will set this car apart.
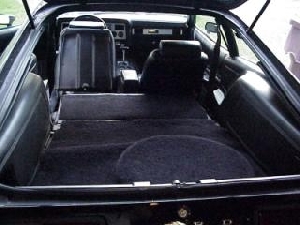
One of these mods was a rear seat delete from Dezines.
This is how the kit looked out of the box. Boxed up well.
Before we rip the seat out, this is what it started out looking like..........
Ok, rear seat out
With these new cars, the back seat does not weigh much at all.
My son, Jeff, helped out and tighten the bolts that protrude to keep the upper part secure.
Finished product...........this was the only place I could find a rear seat delete that would match the interior carpet and colors..........The fit and finish was excellent.
Other items on the List were:
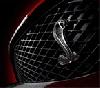
Added Shelby badging in the car itself
Door Sill Plates
Map Light
Trim around the Hurst Shifter
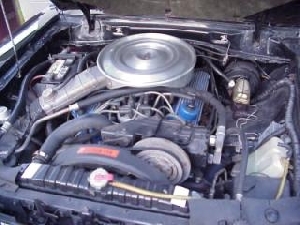
Chrome Fluid Covers (radiator and power steering)
Dip stick and brake fluid cover
Chrome Bolt head covers
Some blue wire wrap to spice it up
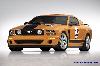
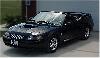
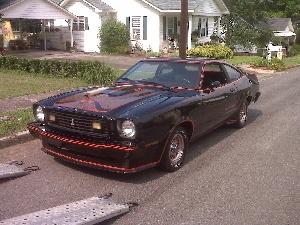
New Hood
Pattered after the 1967 Shelby Hood. This hood by Cervini's is totally functional.
I have not had the stripes put on it yet, that should come in a few days.
Roll Bar install
I finally found a single hoop roll bar. Many have asked why a single hoop and not a 4 point or 6 point. Well, remember my Theme is a 1966/67 Shelby GT 350 and they had a single hoop roll bar factory installed.
Above and Below you can tell how it attaches (to the 4 seat belt mounting points)
And before you ask, yes I did paint & install it myself. All you really have to do is pull the passenger front seat.
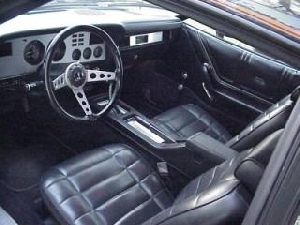
New Gauges
I went back and forth on which gauges to use and how to mount them. I did not like the A pillar mounts, it reminds me of Fox body stuff or possibly "ricers" (no offense). I did like the Speed of Sound pillar mounts but could not commit to it. Then I saw the prototype Shelby convertable with a 3 gauge cluster on the dash. Never cared for the CDC mount as it did not match the dash. The Shelby cluster was perfect, in design, display and everything. Shelby did not ever produce the gauge cluster after many months of advertising it on the web site. Finally Autometer did, and improved on the design by facing the gauges towards the driver.
Next was the choice of what gauges to install. Many people have installed water temp and oil pressure, even though we have gauges(faux at best) in our cars. I finally chose autometer cobalt digital voltmeter, narrow band O2 and DPSS digtal shift light.
New Autometer Dash Pad mount
The digital voltmeter was the easest to install, the others, well.........had a challange to it. The Fuel/Air meter required you to tap into the PCM O2 sensor wire.
Next was the shift light, and of course the new Mustangs do not have a "clean" signal available, so you have to buy a adaptor from autometer, tear apart the engine compartment fuse box, cut wires, connect the adaptor and put it all back together again. I forgot to take pics, so I borrowed these from the autometer web site.
 
You cut the two red wires in the yellow circle, splice in the adaptor and you are done. I got it all put together and surprise, surprise it worked! But not right away, I used add a fuse and the instructions tell you that if your equipment does not work, flip it over so it will. That is what I had to do.
| 


 Page 11 New Hood, Gauges, Roll Bar